PATCHWORK SKATEBOARD
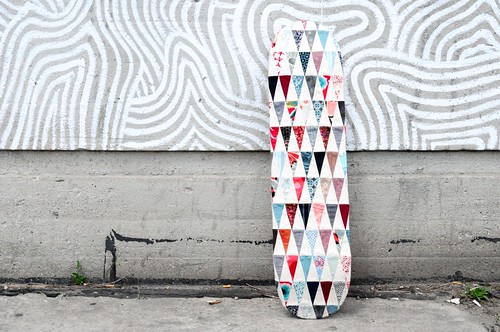
I am so excited to finally be able to check off #6 on My Crafty List of Things to Do – design a skateboard! I received my blank deck back in February and looked at it everyday, pondering just what I was going to do. I had the idea to make a piece of patchwork that I might somehow wrap around the deck. I also had triangles on my mind, inspired by the fabric bunting in the workroom’s window that I just can’t seem to bear to take down.
I decided to make use of the workroom’s laser cutter to help with all the cutting. I’ve been wanting to test this out to help doing patchwork. Every single fabric triangle was laser cut and they are all the exact same size. I knew this kind of precision would be really helpful, especially since I had it in my head that I was going to hand piece the entire thing.
Before attempting to put the real thing together. I did a little test piece. I made a small triangle patchwork sample that I tested wrapping and gluing around a piece of plywood. I had purchased a bottle of Martha Stewart’s Decoupage Glue a while ago, hoping it would do the trick. It worked perfectly. To adhere the patchwork to the wood, I applied the glue to the wood and smoothed the fabric on top. I then brushed on a layer of the glue over top the fabric. The two things I learned from doing this test were 1. the wood showed through the muslin pieces more than I liked once it was glued and 2. one layer of glue on top of the fabric was enough. More than that and the fabric started looking dull and plastic-y. To compensate for the show-through on the muslin, I decided to glue a solid piece of muslin to the skateboard deck first and then glue my patchwork on top of that.
Of course all this was started about a week before I needed to submit my finished deck. Even being short on time, I was absolutely determined to sew the entire thing by hand. After doing our Hand Work class, I love having a hand sewing project on the go. Sitting in bed and sewing is so fun! There were a couple late nights, but when I finished sewing all 200+ triangles together, I was so happy with how it turned out.
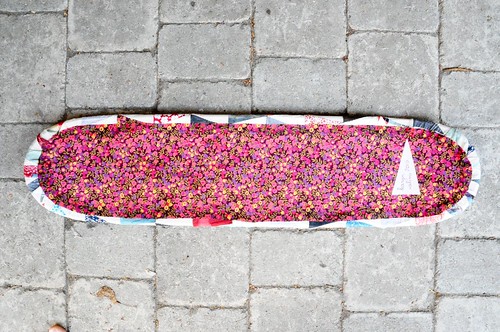
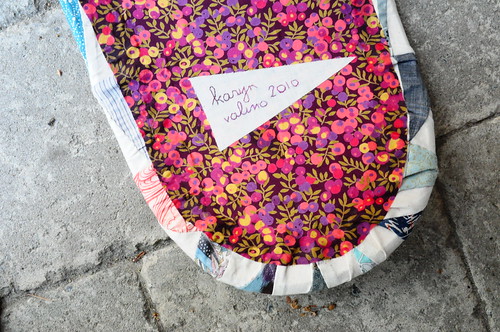
When I had finished gluing the finished patchwork to the deck, I realized that the back of the deck wasn’t so pretty. I couldn’t have that, so I found a large scrap of Liberty of London ‘Wiltshire’ (from this dress), glued it over the back and then hand embroidered a little label.
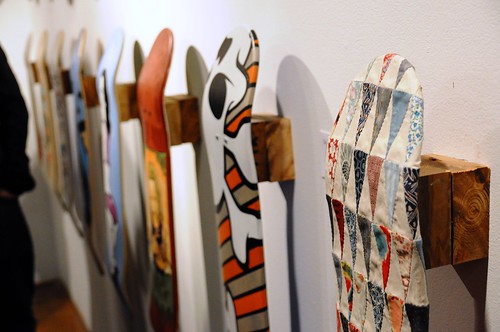
The actual auction night was super fun. Tons of people came out to see all the artwork and finished decks. All the decks were so different and lots of them were really clever. Even though Andrew bid on my deck a couple times (so sweet!), by the end of the night someone else had outbid him, so it’s gone to another home. I couldn’t resist bidding on Derrick Hodgson’s deck and I actually won it! I haven’t picked it up yet, but I’m currently trying to decide where it’s going to hang.
All my photos of my work in progress and the Disposable Artshow night are here. Thanks to Freedom Fighter Skateboards and Joey for letting me take part. I’ll admit that I’m already hatching ideas for another deck for next year’s event. Why stop at just one?


18 comments
One of my friends has a laser cutter so this is making me wonder how much cutting time I could decrease. Most of the time I don’t work with exact shapes but just think of the time savings for something like hexagons.
very impressive! And, cute shoes.
Beautiful! Congratulations! This is so lovely and really has your style and skill displayed all over it.
This is amazing!
Did you find out who won your board in the auction? it’s so intriguing! it looked great with all the other boards. Congrats!
BRAVO!
you are seriously incredible!
it turned out great Karyn!
wish I was able to catch the show.
i was so waiting for this result as i couldn’t imagine the outcome at all. it’s so freakin’ fabulous!!! i bet the others had some cool graffiti old-school skater design and then there was yours looking so completely different. it’s the best!!
super cool dude!
At last the long awaited masterpiece! it’s as brilliant as I’d hoped it would be. clever lass indeedy.
My husband has a dozen skateboards… I am tempted to take one now and patchwork it 🙂 You did an amazing job! I love it.
Your skateboard is fantastic. I have a laser and was wondering if it would cut fabrics.